
November Projects
- Dec 26, 2018
- 3 min read
Two things happened in November that prevented me from doing my blog post on time. The first was my new job, I started working full time on November 1st, this didn't leave me much time for blogging, partly because I had a lot less free time and partly because I haven't worked full time for years and was really tired. Also my old laptop died, the screen split and before I could back up my files it made a pathetic pop, the screen went black and a tiny trail of smoke rose from the corner. I was going to look at getting a new one in the new year when I had had a couple of pay packets but mum and dad decided to get me a new one for my birthday. Bless them.
When me and mum were clearing out cupboards in the kitchen a few months back we found an old cake tin in the shape of a Christmas tree. It was pretty tarnished and unusable for cake again so mum was all for putting it in the recycle bin. I said to put it to one side and I would make something with it for Christmas.


I decided to put some holes in it and lights inside. I drew around the tin on paper, cut the shape out and drew a design on it. I stuck the paper to the tin with tape and took it outside to the garage to work on the pattern. I found some nails in different sizes and a hammer, I put blocks of wood down for the tin to rest on and started using the hammer and nails to pierce holes following the design. I did have some pics of the design and process but they were lost when my old laptop died. It took quite a while to do all the holes, I turned the tin back occasionally to bend the metal back to shape.


I used some card to cut a back, I drew around the tin, cut the shape out and trimmed it and tested it until it fit snugly in the back of the tin. I used that piece of card to draw another shape and cut that out too. I got a couple of sheets of tin foil and glued each sheet to a card tree shape. I trimmed the foil to around 1cm around the edge of the tree and folded it over gluing it down. I got the set of LED lights and stitched them to the foil side of one of the card shapes. when I had finished stitching the lights on I glued the shapes together foil side out and taped the edges.


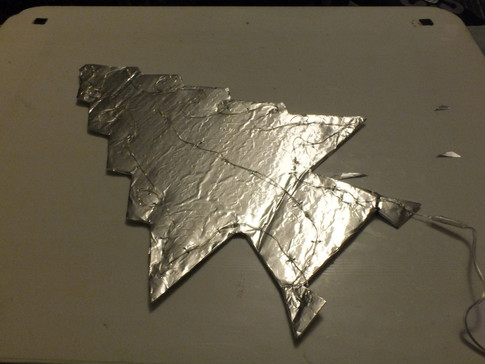
I fitted the card into the back of the tin and it was finished, I left a gap in the bottom so you can switch the lights on and off. I'm pretty pleased with how the piece came out, I would have preferred to use thicker card for the back, but the two layers are fine. I could always replace it at a later date. My brother took the pic below.


I finally got round to drawing a leggings pattern from the instructions on a blog. I lost all my bookmarks when my old laptop died so I currently have no idea what page it was, I shall update when I find it, if I do. There are lots of sites that have instructions on though so if you google it you'll come across something useful. Basically you take a load of measurements of your leg and plot them on paper the length of your leg-waist. I had a piece of fabric that was too small for full length leggings so I made a pattern for calf length ones. I found the drawing process easy to follow, I made a mistake in a couple of measurements so I had to do it twice but it wasn't hard. I used the pattern to cut two pieces of fabric and stitched those together with a stretch fabric stitch on my machine and an edging stitch to stop my fabric fraying. I added elastic around the waist and cuff type things on the bottom of my leggings to make them a little longer using some off cuts of fabric.


They are not exactly a pretty item of clothing but I wear a lot of leggings so it's sensible to be able to make some. They fit pretty well, and there were no stretched seams, I will leave more seam allowance next time though if I have the fabric. I used the stiffer of the 3 jersey fabrics I bought, I shall use something with more stretch next time and see how I go.


Comments